Welcome to my Sharps 'n' Dulls, the place for me to share my witty and not so witty humour, about my life around the university of eastern funland, games and comics as well as my projects in cosplay and props.

Sunday, November 27, 2011

Random fun with modelling clay: PuPu from Final Fantasy VIII

PuPu the cute alien.

Final Fantasy VIII... What's there not to like? I honestly can't answer that because I'm somewhat a FF8-fanboy, hehe^^'  Okay, so I haven't finished the game yet because I like taking my sweet time doing random and mostly pointless stuff, but that's beside the point. I just managed to finish the alien-sidequest day before yesterday and decided that I have to return to my fresh patch of modelling clay and try to make myself a cute PuPu^^

Having trouble to get a good picture of the little guy XD

He/she turned out really awesome!^^ you might not see it but I made the eyes into swirls like in the game. There were some issues getting the body balanced, my fingers are normal-sized but that's still sort of clumsy when working with something so small, that explains why it was so difficult to make him/her stay upright.

Elixir please! 
I might've ended up making little PuPu a bit overweighted but those elixirs are rich with flavour and energy, right?^^ (Does anyone know if elixir contains any alcohol by the way? XD) He/she's a bit under 7 cm or little bit over 2 1/2 inches in height.

Guiding a spaceship down?
Okay, with this overly cute update, see ya next time, kupo!


Thursday, November 24, 2011

Random fun with modelling clay: Vocaloid Hatsune Miku


Popipo (Vegetable Juice) by Miku Hatsune

I hadn't played with modelling clay in such a long time that I just felt compelled to buy some when I saw some in the crafting store I was browsing for the Halloween-themed Housewarming party I held with my roommate. The party was great but I ended up misplacing the clays before the party so I never managed to make anything out of them then^^' But yesterday I finally sort of found them (I moved a box and saw what an idiot I had been for not noticing sooner), right where I had left them... After that I instantly had to start making something, but I didn't have a clue of what I should make. My roommate came to my rescue with her idea of making Miku from the song Popipo... Insane ideas are the best sometimes so I started molding different clays^^ (originally I had planned on making something simple, like a Pokémon or something, but this was just as fun) There's not much to tell about the making-of-progress as most people can make something resembling something else out of clay, like I did! I didn't even attempt on making it big or well detailed, and I was finished in 30 mins or so. Most of the time was spent on wiping my hands clean of the previous coloured clay. You wouldn't want your white clay turning into a gray one just because you just handled black clay, do you?

Right after finishing.

 Found a nice place for it in my bookshelf.

It was really difficult to get a good close-up.

And it should be noted, Miku stands 7cm or almost 3 inches from the ground/shelf XD I'm thinking of making more tiny little thingies in the future^^

Tuesday, November 15, 2011

The Sims Medieval - Doomstaff (unfinished)

November 15th

Okay, back at last^^' I've had a little break from building and/or updating my blog, sorry about that. My girlfriend and I broke up a month or so ago, but past is past. The more important thing is the project I started for her, and still haven't finished, as I'll still need to aqcuire some materials and a better plan to make it look good. I had thought about not making any unfinished prop-updates, but I probably wouldn't write too much on one sitting anyway, so I shall just update one post, and make the progress and updates visible with that date-marking I shall start using in the beginning of updates. I think it'll be less confusing to just make one long post than to make multiple about the same project, right?^^

Okay, back to the subject at hand. My project this time is quite an ambitious one because of it's size and odd detailing in my opinion as I haven't made anything like it before. It's the Doomstaff from the stand alone Sims-game The Sims Medieval, basically a big scythe the Grim Reaper from the game uses. It's also a forgeable item for the Wizard -Hero Sim.

The Grim Reaper appears.

It's pretty obvious why I wanted to try and make this weapon, the sheer shape of the blades was enough to send chills down my spine, in a good way.

Grim next to a Spy -Hero Sim overseeing someone's death.
I began this project in the summer, and I've been working on it slowly, few minutes every now and then. Believe me when I say that most of my working time has been spent on just staring the pieces and the plans, I want this to be perfect, I just hope it won't become a disappointment when I finally assemble it.

 A Wizard meditating with the Doomstaff.

This is the main picture I used when starting to design the two blades. I measured the basic proportions between Sims and the Doomstaff from various pictures to get a somewhat accurate idea of the size of the weapon. I ended up scaling the picture so that it would do two things: One, fit on paper and two, be easy to enlarge. I used a picture 1/3 of the full size for the blade. I then used a simple method for the blueprint: the "magnify the picture and draw it on the paper through the computer-screen"-method. (copyright pending, haha XD) The printer I had at the time decided to die so I had to improvise^^' I'm quite disappointed that something mysterious has happened to the blueprints so I can't show you the work it took, but I'll try explaining it in detail.

What I had to work with...

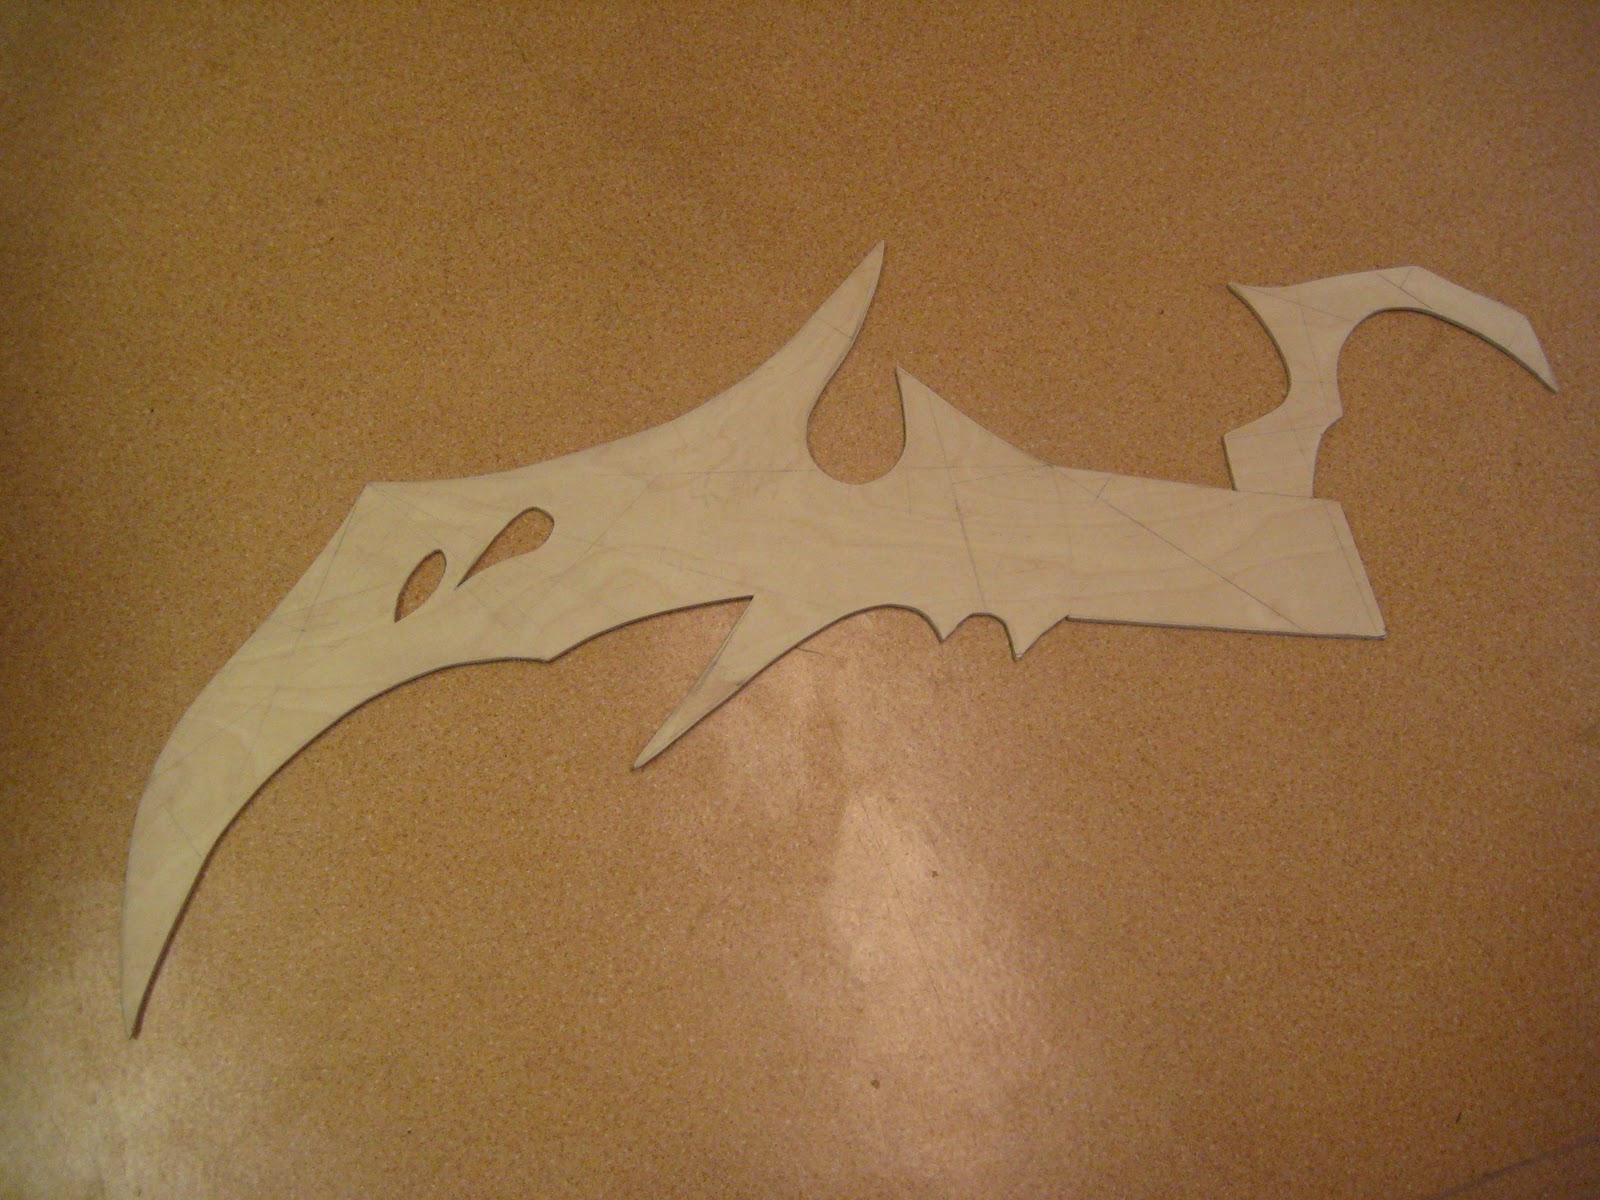
This'll need some explaining. I tried to save this piece of plywood as I had measured it would just barely be enough for the blades, as I wanted to make it unipieced so it wouldn't break down as easily. And then my dad was coating a door with tar and guess what he used  to stand on? Okay, I admit it worked and the tar didn't ruin the new concrete floor we had just finished but still, why use this piece of plywood?-.-' Just goes to show how little I'm given respect... But anyway, it didn't ruin the blade, as the ply didn't break or crack and tar only helps to keep the moisture out so I decided it wouldn't be that big of a problem^^' The lines you can see are how I copied a scaled down version of the blade into full scale. I used straight lines from points where the blade hit the edge of the plywood and right angles from premeasured spots. I'm still quite amazed about how well it worked out after I connected the points and lines. I only had to make one or two minor corrections drawing freehanded to the measurements, just to make the lines smoother to the eye. I transported the board before any sawing to the apartment, just to keep it safe and also because I was worried something might happen to it if I saw it and then tried transporting it on a bus...

Rough form.

I bought a hand-figure-saw to cut the shape, it was quite tiring and I ended up destroying at least half a dozen saw-blades. Lucky they aren't all that expensive^^ And as you might think, the extra plywood cut out didn't go to waste, heavens no, I wouldn't dream on throwing good pieces away^^ And as it turns out, I used some of the wood in The Great Gun King. Golden rule, don't throw something away if it could be reused in anything, no matter if you might not know what that something is yet, ok? Ok, moving on. The blade is 123cm for the longest distance and 47 cm for the two abeam tips from the center. I can always provide exact measurements when asked, but for now I can't bother on measuring every single curve^^' I intend on doing exact blueprints out of the blade-part for future preferences, so until then, let's move on, shall we?

The main staff-part and the blade together.

The main staff-part as I call it isn't anywhere ideal, but I got the go-ahead from the client, so I'll try working with this. It's really difficult to find the shape needed growing naturally in the woods so I had to work with the one I thought was closest possible. I'm afraid that it has taken up some moisture and became crooked, but it's not the end of the world, or so I'm being constantly told^^' It measures 190cm and is still quite heavy, which is a given considering on how bulky it has to look. I managed to make a cut to the end of the staff for the blade to fit through, too bad I had to risk it being destroyed and use a chainsaw, but it worked out fine. Don't try that at home, buy or borrow good quality equipment you're comfortable in using and which suits the your needs. But as I've said often already, I have to make do with what I can get^^'

After the two holes.

Again, try using proper tools, not a knife to drill holes, you might cut yourself, as I've done on many occasions, I'm lucky to have all my fingers intact. And yes, nearly 99% of my projects make me bleed one way or the other, this made me bleed from a splinter when I was scouting for usable plywood-piece. But about the blade itself now, I personally like the holes quite a lot, they make the blade appear like it would only have one big hole in it with a blood vessel going through it, and in my opinion it gives it a nice Grim Reaper-ish touch, intentional or not.

After some sanding.

You might notice that the blade has suffered some moisture/drying-crookedness between the two last pictures. I usually tend to keep the material in the same enviroment through the entire working-progress to preserve the moisture-conditions in order to avoid things like this. I'm still quite puzzled as to what happened, it's not like I took it into the rain every now and then... Anyway, I believe it can be fixed or at least hidden so that it wouldn't show that much, we'll just have to wait for the paint^^

 Close-up on the bending.

 It's not much, but it annoys me all the same...

Biggest flaw.

But this is the thing that annoys me the most, although it could be fixed, I was assured again that it would be better this way, as the Doomstaff should have the ragged feel of the medieval times, and that's easier with minor flaws in the shape. So for now I'm not fixing this. It was caused by the use of knife, I didn't want to sand the blade into shape from scratch, and I didn't have a file at the moment. Plywood is kinda tricky to work with because of the different layers but I'm glad only this one crack happened. You can now also see how the edge is "sharp" after the sanding.

 The holes after sanding.

 I took this picture to show you how the tar-damage isn't all that serious as I had you assume, and to point out the amount of sanding done to the two holes. I didn't sharpen them nearly as much as the outer edges as I see no need for that. I just worked a lot on the details, most of the work is such which no one even sees, But I know it's there^^

That wraps it up for now, more on the progress when I get it done, there's more than half of this project to go, but no matter, I'll look forward to it^^

Friday, September 2, 2011

The Great Gun King - Disgaea 3: Absence of Justice

My girlfriend's latest cosplay is Salvatore the Magnificent from Disgaea 3: Absence of Justice by Nippon Ichi Software and she ordered Salvatore's weapon from the special move The Great Gun King, which is a giant golden gun as name suggests with wings.^^' Salvatore summons it into battle and rides the bullet fired from it straight towards the enemies. The bullet then rams into them, sending them flying. Luckily my girlfriend wanted a handheld version so I didn't have to start planning a surfable projectile.^^ You can read more about her cosplays and other stuff on her two blogs: Miss Mii and Rosy Predictions. Miss Mii is a 4H-youth company she founded and the site is where she shows off her crafts and sells them, if you're interested in cute and original clothing, this place is worth checking out! Rosy Predictions is her personal blog where she ponders about the wacky ways of the world^^

 Salvatore just about to jump onto the summoned gun and fire.
I used a toyrevolver found in the BR-toystore as a base as it had the best fitting looks and it wouldn't break that easily. I usually do prefer wood and metal over plastic, and this gun being metal was just what the doctor ordered^^

Marshal-revolver from a BR-toystore in Tampere
 
First thing I did was dismantle the crip as it wasn't what I wanted, I still have the parts though, migh need them in a future project^^ Next I used a metal saw and cut the trigger-guard from the front and used a file to shape it into the wing that points forward. I saw no need to remove the guard and do a wing from wood, as the shape came out pretty nice and it wouldn't break or chip off like wood could. I then cut off some pieces off some extra plywood, which I had (always save extra pieces!) from my still ongoing project, into the new crip-pieces.

Speaking about stuff not breaking, second day of the build (yes, I was in no hurry) I find the main gun-piece on the floor, it had fallen from the piece-box, probably one of our cats had bumbed into it, causing it to fall, breaking the hammer. It wasn't a huge loss, I suspect it might've snapped anyway at some point, which would've forced me to file and repaint it.

After a little bit of trouble with fitting the tight pieces and glueing I continued to sanding the crip into a more tolerable shape. I also filed the front sight in half and started working on the main-wings.

The wings were my biggest concern, because in order to achieve a firm and lasting result the wings had to be made out of one single piece. I also couldn't drill any holes into the main body as I don't own a drill, yet^^' Thus the wings had to be able to stay in place with glue alone. I did add a spare nail into the wing with the intention to use some wire to pull the front tip of the wings tightly against the main body, keeping it steady, this was the only added method of keeping the wings in place, apart from the glue. Therefore a lot of weight landed on making the gap tight enough to hold the wing in place even without the glue but loose enough so that the stress wouldn't break the wings in half. The final wings in the picture to the right were in fact the fifth wings I had to make, because the previous four were not good enough. (good thing to have a lot of saved extra pieces of plywood, right?) I then sanded/sharpened the wings so they would look good and rough-sanded the main body so that glue and paint would stick and then the final assembly started.

  The painting was tricky, the brown paint I bought from the crafts-shop Tiimari was perfect and easy to work with as it could be mixed with a little bit of water to make thinner layers. But the gold-paint from the same shop was horrible, it was a spray-can-gold for Christmas-decorations. Few layers and drying later the gold-finish would just peel of with touch into powder, making the gun look like it was brass-coloured instead of gold. Luckily I remembered that model-paint left a very nice finish with the metallic paints. I went and bought gold number 94, the most basic of gold out there. After the first layer I couldn't help but to feel like a fool for even trying anything else, because the price for the gold paints doesn't show in the quality. Spray-can cost 4.50€ while the modeling-paint was 1.95€... And they both last pretty much as long, as you don't have to worry about wasting the model-paint if you can hold your brush, but with the spray-can, you're most likely going to miss your target anyway and have the furniture-protecting paper all nice and golden. Oh yes, the spray-paint seems to be perfect for paper, as the newspapers I used didn't lose the paint like the actual gun did~.~'

All and all, this was a nice project, my girlfriend was very pleased with this, which is the main thing, though I'm such a perfectionist that if the work is not as good as I can achieve with my skill (or lack of it) I'm not even going to bother handing it over to the client and asking for compensation.

Well that's about it really, it took me around a week and a half to make it, and I don't think my girlfriend's magnificent outfit is going to lose in competitions because of the prop^^